
Airtable No-Code Messaging Integration: Send & Receive SMS, WhatsApp, Voice and RCS
Connect your Airtable account once, load a base and table, map the mobile field, and automate messaging without scripts or Zapier. Turn on Send SMS, Send WhatsApp, Send Voice, or Send RCS when a new record is created. Write delivery status back into a mapped field, and log inbound replies as new records in Airtable.
What is Airtable No-Code Messaging?
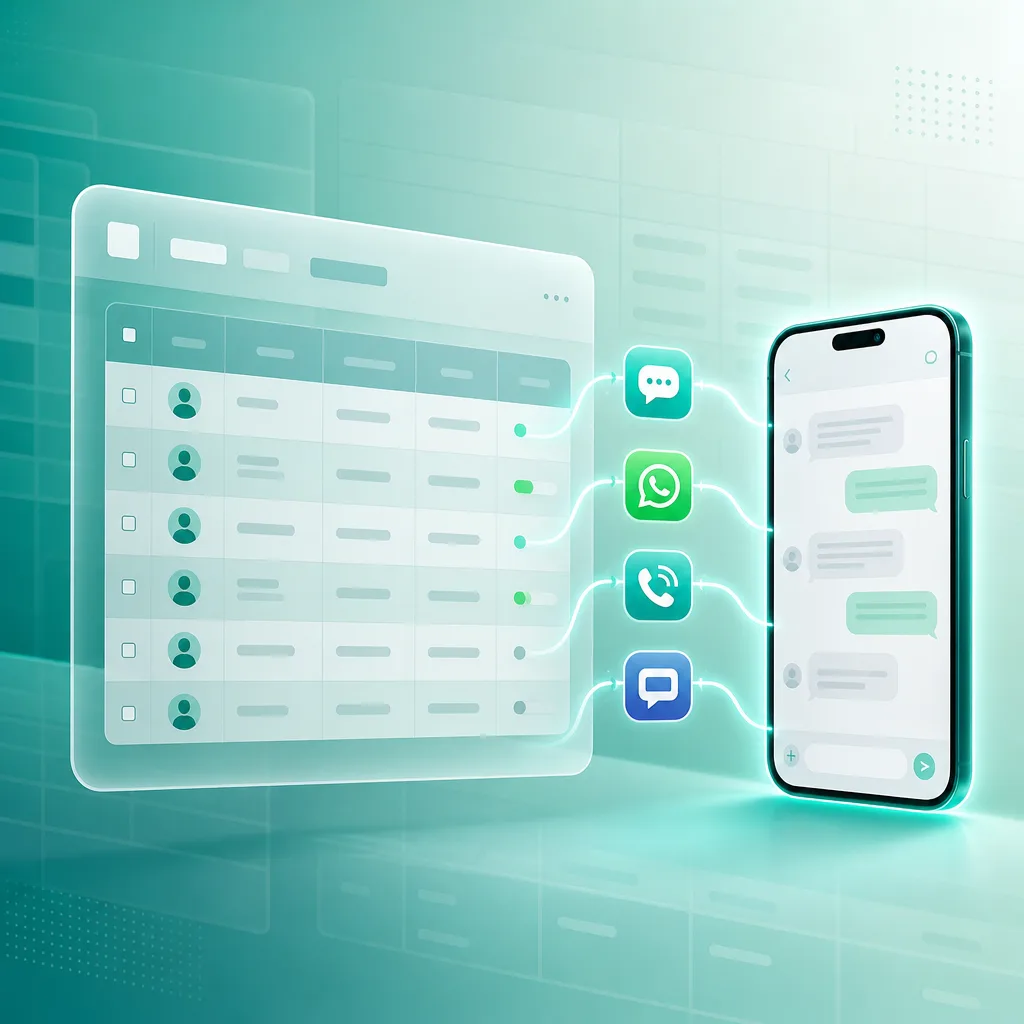
Airtable No-Code Messaging Integration connects your Airtable bases to your SMSGatewayCenter account so new table rows and messaging stay in sync. Add a record, and a message can go out. A customer replies, and it can land as a new row in a replies table. Delivery status can write back into the field you map once.
What Can You Automate, Per Table?
- ✅ Send SMS, WhatsApp, Voice Call, or RCS automatically when a new Airtable record is created
- 🔗 Personalized messages using Airtable field placeholders such as
{Name}and any other column you insert - 📥 Log incoming SMS, WhatsApp, or RCS replies as new records in a destination table
- 📊 Delivery status (SENT / DELIVERED / FAILED) written back into a mapped Airtable field after each send
- ⚙️ One-time Airtable OAuth connect, then pick base, table, and mobile field
- 🔒 Fully secure, DLT, and TRAI-compliant for Indian businesses
Ideal for ops, sales, and support teams that run pipelines in Airtable and want messaging without writing code.
Automate SMS, WhatsApp, Voice, and RCS both ways from Airtable using SMSGatewayCenter. Connect once, load tables, and let messaging run.
All Channels You Can Enable Per Table
Mix outbound sends and inbound reply logging independently on each connected Airtable table.
SMS
Send free-text or DLT templates on new records. Choose Sender ID, message type (Text/Unicode), and insert Airtable fields into the body.
Send approved WhatsApp templates. Map header, body, and button variables to Airtable columns or fixed values.
Voice
Place an outbound call and play an approved audio clip from your voice library when a new record is created.
RCS
Send approved RCS templates from a verified bot, with per-variable mapping to Airtable fields.
Log Incoming SMS
Inbound SMS replies are appended as new records in the table you choose for logging (use a separate replies table).
Log Incoming WhatsApp
WhatsApp replies, captions, and button responses are written back as new Airtable records in your replies table.
Log Incoming RCS
Inbound RCS messages and button taps are logged as new records so teams see the conversation alongside the base.
Relevant Messages You Can Send From Airtable
Personalize with Airtable placeholders. These samples use the SMSGatewayCenter teal conversation style.
Welcome a new lead
Confirm with a template
Call with an audio clip
Reply lands in Airtable
How It Works
Four Steps, No Code
1. Connect Airtable
One-time OAuth from Connected Services in your SMSGatewayCenter panel. Your Airtable identity shows as Connected once linked.
2. Connect a Table
Click Connect a Table, pick a base and table, and select the mobile number field.
3. Enable Channels
Flip on outbound Send SMS / WhatsApp / Voice / RCS and inbound reply logging. Map delivery status fields if you want write-back.
4. It Runs Automatically
New records and replies are picked up on a short polling cycle, about once a minute. Check Recent Activity to confirm delivery.
Step-by-Step: Connect Airtable and Set Up Messaging
Follow these steps in order. Typical setup takes only a few minutes once Airtable OAuth is available on your account.
Step 1: Open Airtable Integration
Login to your SMSGatewayCenter account. From the sidebar, open Integrations (or Connected Services) and choose Airtable.
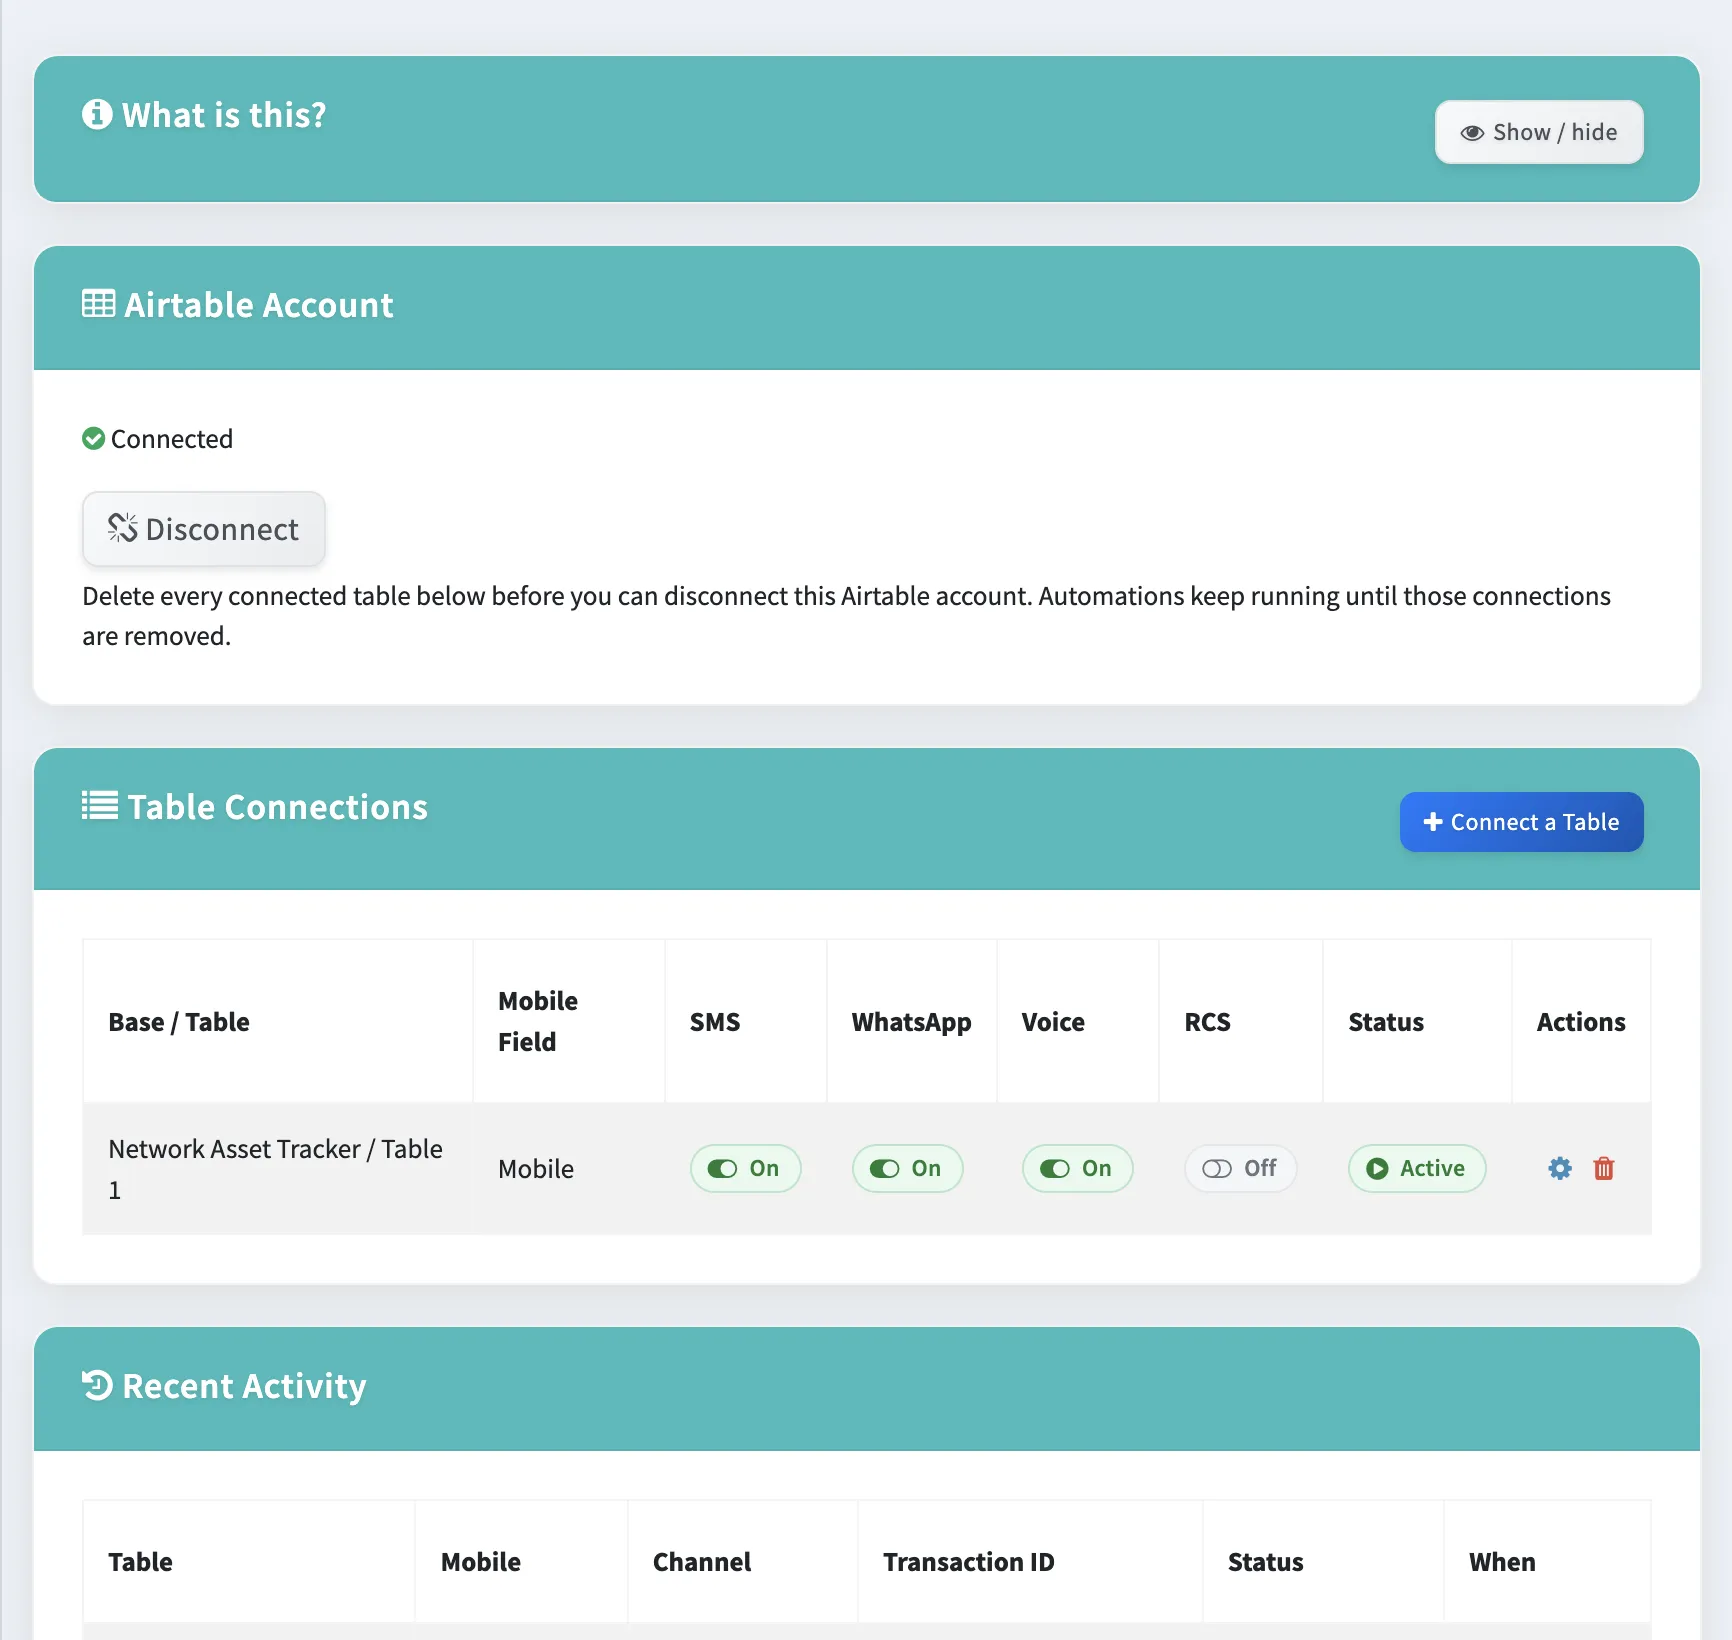
You will see an overview of outbound sending, delivery status write-back, and inbound reply logging, plus the Airtable Account, Table Connections, and Recent Activity panels.
Step 2: Connect Your Airtable Account
Under Airtable Account, click Connect Airtable if you are not linked yet. Complete the Airtable OAuth consent. When done, the panel shows Connected, with a Disconnect option available after you remove table connections.
This is a one-time step per account. Your reseller or platform admin must have Airtable OAuth client credentials configured before OAuth works.
Step 3: Click Connect a Table
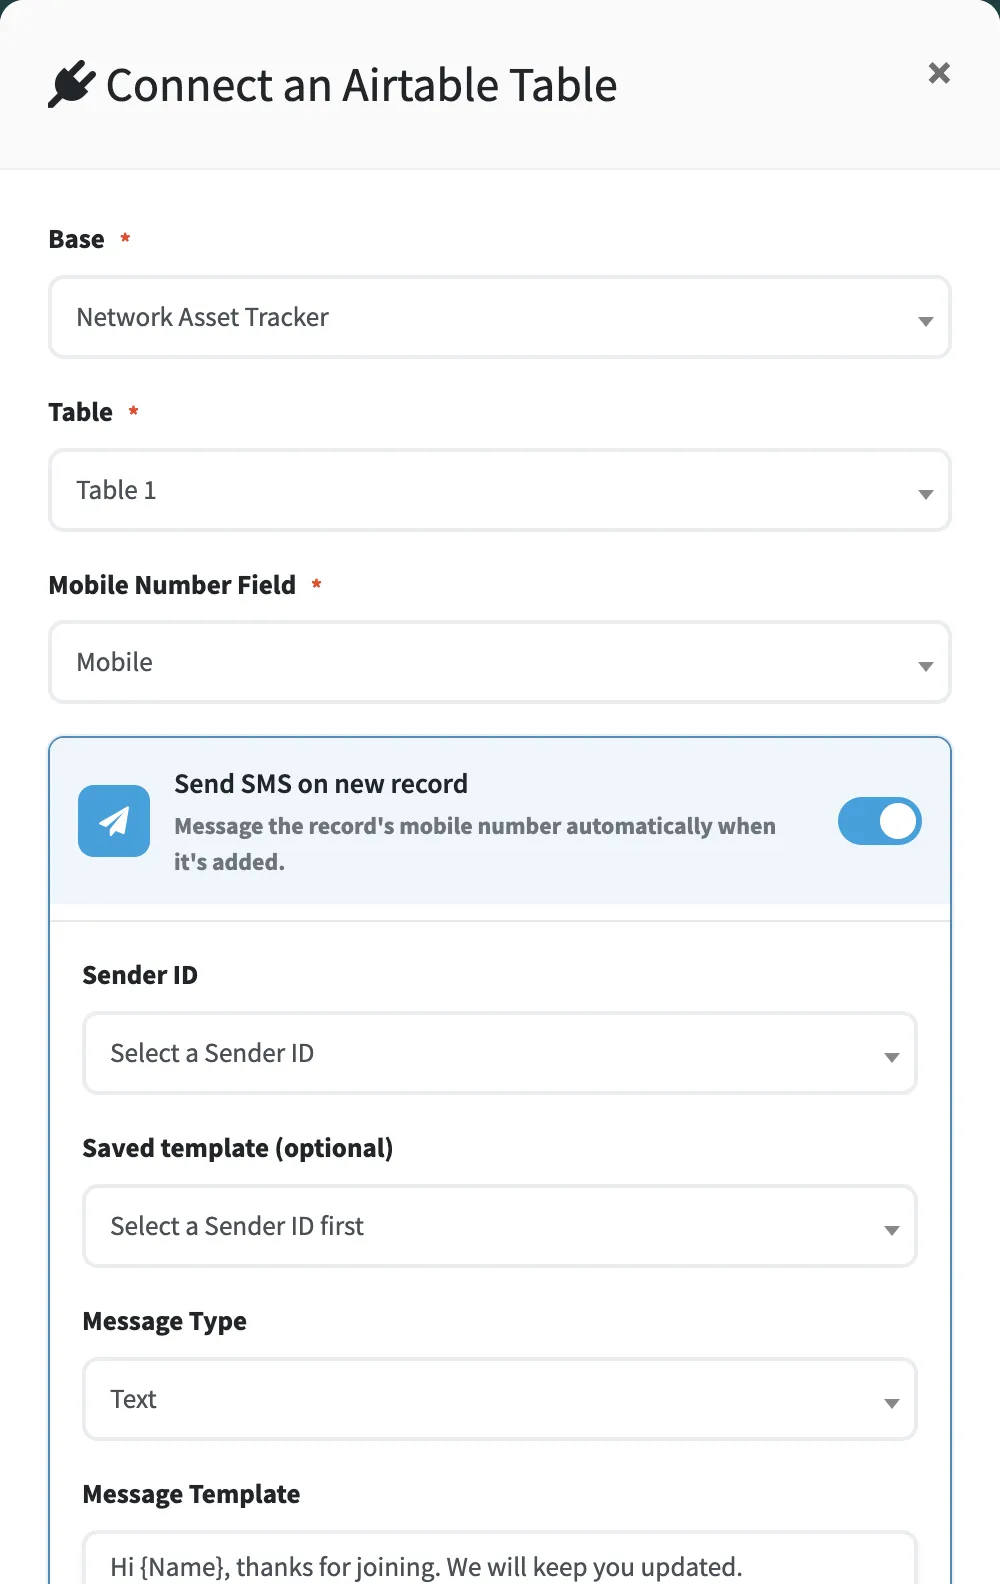
Under Table Connections, click + Connect a Table. A dialog opens where you choose an Airtable Base, then a Table, then the Mobile Number Field.
Only genuinely new records trigger sends. Adding a row with “+”, or importing rows, works. Editing an old blank row that existed before you connected does not, because Airtable’s record-creation time does not change when you edit a cell.
Step 4: Enable SMS and Other Outbound Channels
Turn on Send SMS on new record. Choose a Sender ID, optional saved DLT template, message type, and write your text with Airtable field placeholders. Use the field picker to insert tokens such as Name.
Optionally map a Delivery Status Field so SENT / DELIVERED / FAILED writes back into Airtable once known.
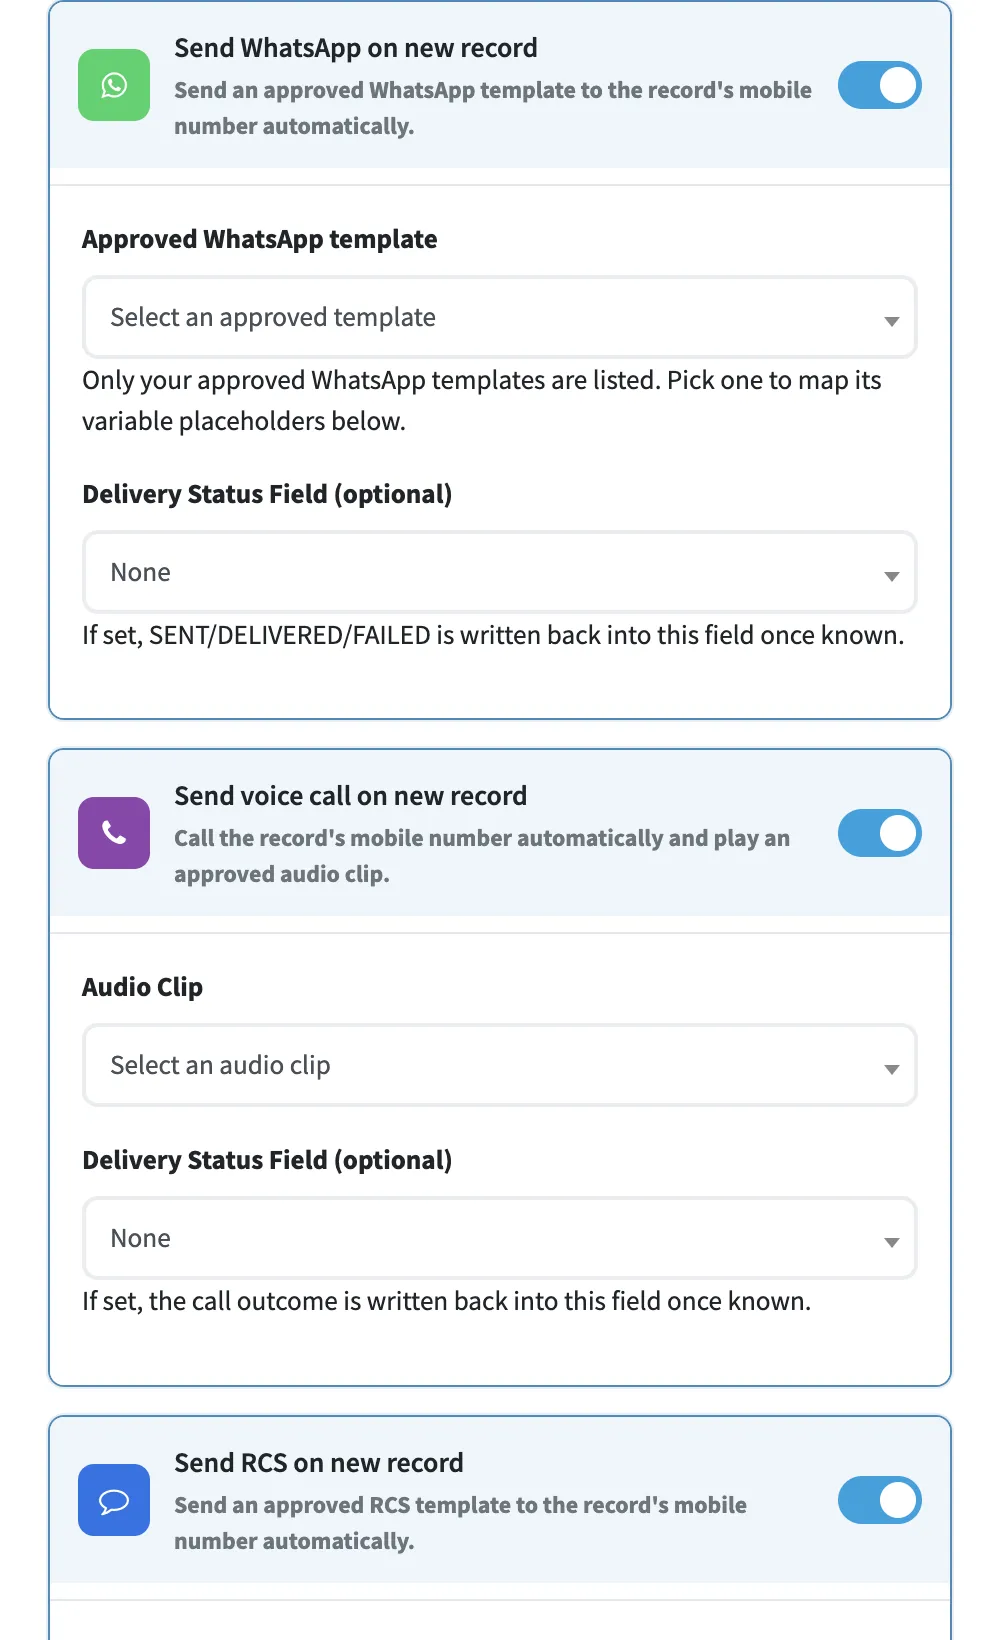
In the same dialog, enable WhatsApp, Voice, and RCS the same way: pick approved templates or audio clips, map variables, and set status fields if needed.
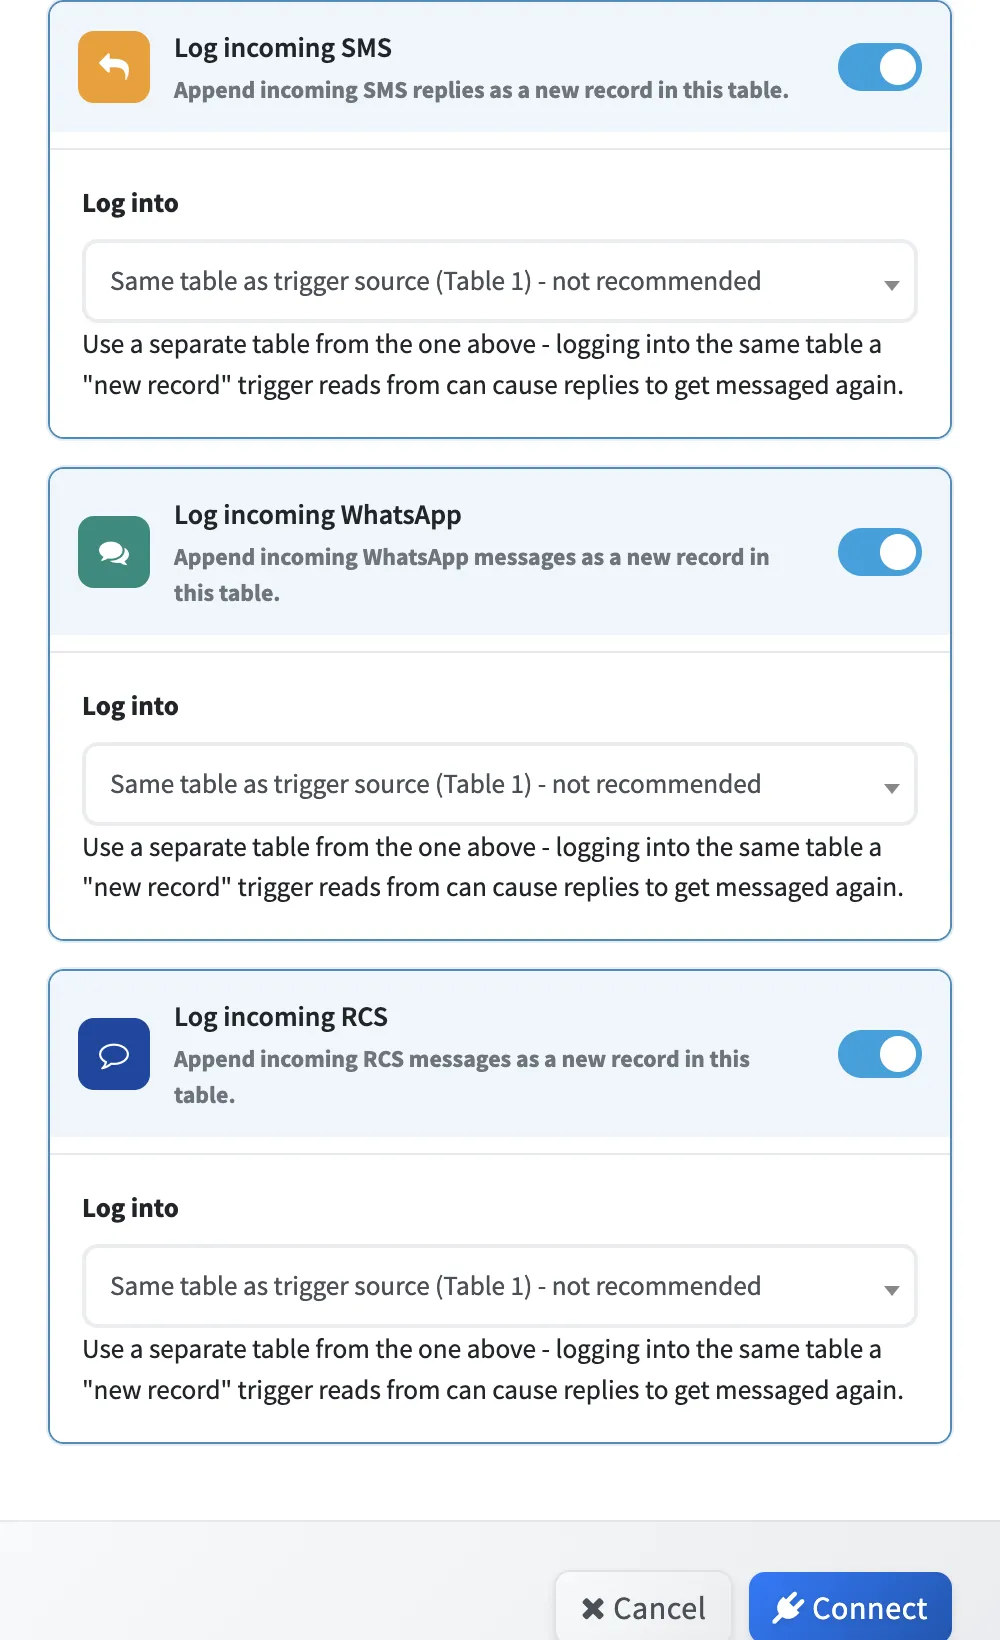
Step 5: Enable Inbound Reply Logging
For two-way context, enable:
- Log incoming SMS
- Log incoming WhatsApp
- Log incoming RCS
Pick a destination table for each. Prefer a separate replies table. Logging into the same table that triggers “new record” sends can cause replies to get messaged again.
Click Connect to save. Create a test record in Airtable and confirm the send under Recent Activity.
Load Bases and Tables to Send and Receive Messages
Start with the tables your team already uses. Each connection has its own channel mix.
Leads / CRM tables
First-response SMS or WhatsApp the moment a lead row is created. Keep reply threads in a dedicated replies table.
Ops / ticket tables
Notify assignees or customers when a new ticket or task record lands. Map status fields for delivery write-back.
Replies tables
Log incoming SMS, WhatsApp, and RCS as new records so support can work conversations next to your Airtable base.
Frequently Asked Questions
No. You connect Airtable with OAuth from your SMSGatewayCenter panel, then connect a base and table. No Zapier and no scripts are required for the create-to-message flow.
Inbound SMS, WhatsApp, and RCS replies are appended as new records in the destination table you choose for each channel. Use a separate replies table to avoid re-triggering outbound sends.
For each outbound channel you can map an optional Delivery Status Field. Once known, SENT, DELIVERED, or FAILED (or the call outcome for Voice) is written into that Airtable field.
Automations run on a short polling cycle, about once a minute. Most new records trigger within one to two minutes. Use Recent Activity to confirm processing and delivery status.
Yes. Outbound SMS uses your registered Sender IDs and DLT templates on SMSGatewayCenter routes. WhatsApp, Voice, and RCS still require their usual approved assets.
Ready to connect Airtable to your messaging stack?
Talk to us to enable Airtable Integration on your account, then follow the steps above to load tables and start sending.
Talk to a Specialist